

在〈Implicit 核發流程〉中可以看到,Access Token 就這麼直接地出現在網址列上,雖然 OAuth 2 規範要求核發流程必須在加密連線中進行,不過,如果你對於 Access Token 明明白白地出現在網址列上總有疑慮,那就試著進一步採用 Authorization Code 核發流程。
當客戶端(通常是瀏覽器)請求授權伺服器時,Authorization Code 核發流程會先核發授權碼(Authorization Code)(而不是 Access Token),並要求客戶端重新導向至事先登記好的第三方應用程式網站,授權碼會附在重新導向網址上,第三方應用程式網站要接受授權碼,在後端使用授權碼請求授權伺服器,授權伺服器確認授權碼無誤,才會核發 Access Token 給第三方應用程式網站,整個過程中,客戶端不會知道 Access Token,從而避免 Access Token 曝露在客戶端的問題。
若想實作 Authorization Code 核發流程中的授權伺服器,可以基於〈Implicit 核發流程〉中的成果來修改:
package cc.openhome;

...

@SpringBootApplication
@EnableAuthorizationServer
public class AuthSvrApplication {
    ...略

    @Bean
    public AuthorizationServerConfigurer authorizationServerConfigurer() {
        return new AuthorizationServerConfigurerAdapter() {
            @Override
            public void configure(ClientDetailsServiceConfigurer clients) throws Exception {
                clients.inMemory()
                       .withClient("authcodeclient")
                       .secret(passwordEncoder.encode("authcodeclient12345678"))
                       .scopes("account", "message", "email")
                       .resourceIds("resource")
                       .authorizedGrantTypes("authorization_code", "refresh_token")
                       .redirectUris("http://localhost:8082/HELLO");
            }

            ...略
    }

    ...略
}
基本上只是在 authorizedGrantTypes 設定 authorization_code,這個模式下支援 Refresh Token,因此也加上了 refresh_token,在重新導向的 URI 設定中,http://localhost:8082/HELLO 將接受授權碼。
啟動授權伺服器之後,可以請求 http://localhost:8081/oauth/authorize?response_type=code&client_id=authcodeclient&redirect-uri=http://localhost:8082/HELLO,注意附上了 response_type=code,表示要求授權碼,也附上了 client_id=authcodeclient,以及 redirect-uri=http://localhost:8082/HELLO,這必須與授權伺服器中的設定相同。
同樣地,如果使用者未登入,授權伺服器會要求使用者登入,接著核取可授權的範圍,在按下「Authorize」之後,授權伺服器會要求重新導向的網址會是 http://localhost:8082/HELLO?code=61vXSV,其中 61vXSV 就是核發的授權碼。
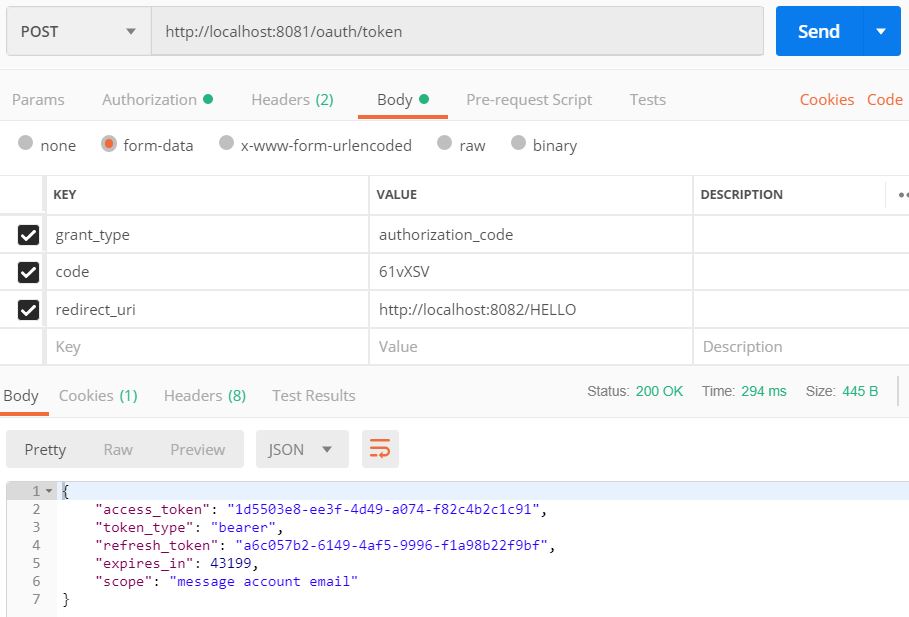
接受授權碼的第三方應用程式網站,拿到授權碼後使用 POST 請求 http://localhost:8081/oauth/token,並在請求本體附上 grant_type、code 與 redirect_uri,記得要以 Basic 驗證附上客戶端 ID 與密鑰,這樣就可以拿到 Access Token 等資訊:
接著第三方應用程式網站再拿著 Access Token 請求受保護資源,底下的範例,將收到授權碼到請求資源伺服器的流程簡單地實作了一下:
package cc.openhome;

...

@SpringBootApplication
@RestController
public class AppSvrApplication {
    public static void main(String[] args) {
        SpringApplication.run(AppSvrApplication.class, args);
    }

    @Autowired
    private RestTemplate restTemplate;

    @GetMapping("HELLO")
    public String app(@RequestParam("code") String code) {
        String accessToken = accessToken(code);

        RequestEntity<Void> request =
                RequestEntity.get(URI.create("http://localhost:8080/hello"))
                             .header(HttpHeaders.AUTHORIZATION, baerer(accessToken))
                             .build();

        return restTemplate.exchange(request, String.class).getBody().toUpperCase();
    }

    private String baerer(String accessToken) {
        return "Bearer " + accessToken;
    }

    private String accessToken(String code) {
        MultiValueMap<String, String> map= new LinkedMultiValueMap<String, String>();
        map.add("code", code);
        map.add("grant_type", "authorization_code");
        map.add("redirect_uri", "http://localhost:8082/HELLO");

        RequestEntity<MultiValueMap<String, String>> request =
                RequestEntity.post(URI.create("http://localhost:8081/oauth/token"))
                             .contentType(MediaType.MULTIPART_FORM_DATA)
                             .header(HttpHeaders.AUTHORIZATION, basic("authcodeclient", "authcodeclient12345678"))
                             .body(map);

        return restTemplate.exchange(request, Token.class).getBody().getAccess_token();
    }

    private String basic(String username, String password) {
        return "Basic " + Base64.getEncoder().encodeToString((username + ":" + password).getBytes());
    }

    @Bean
    public RestTemplate restTemplate() {
        return new RestTemplate();
    }
}
因此從請求授權到最後第三方應用程式完成資源取得並處理之後,你會看到底下的結果:
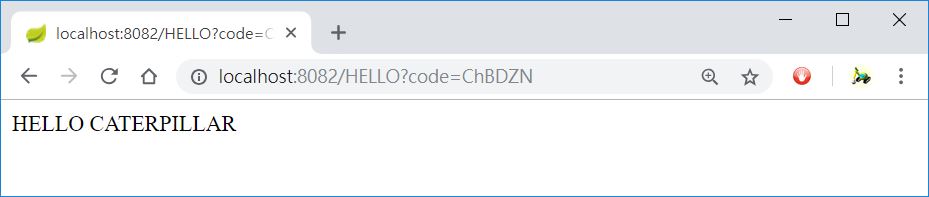
你可以在 OAuth2CodeGrant 中找到以上的範例專案。